Learn to Cross Stitch by Creating Your Own 8-Bit Wumpus
Read MoreHow James Marsters Became A Custom Vinyl Doll
This is the story of how I went from loathing to liking James Marsters, and how that journey resulted in a couple custom FunkoPops.
Read MoreFrom Cheap Hobby Wood To Fancy Photo Staging
When you're looking to make a luxe looking photographic backdrop on a limited budget, look no further than the hobby wood section in your local hardware store.
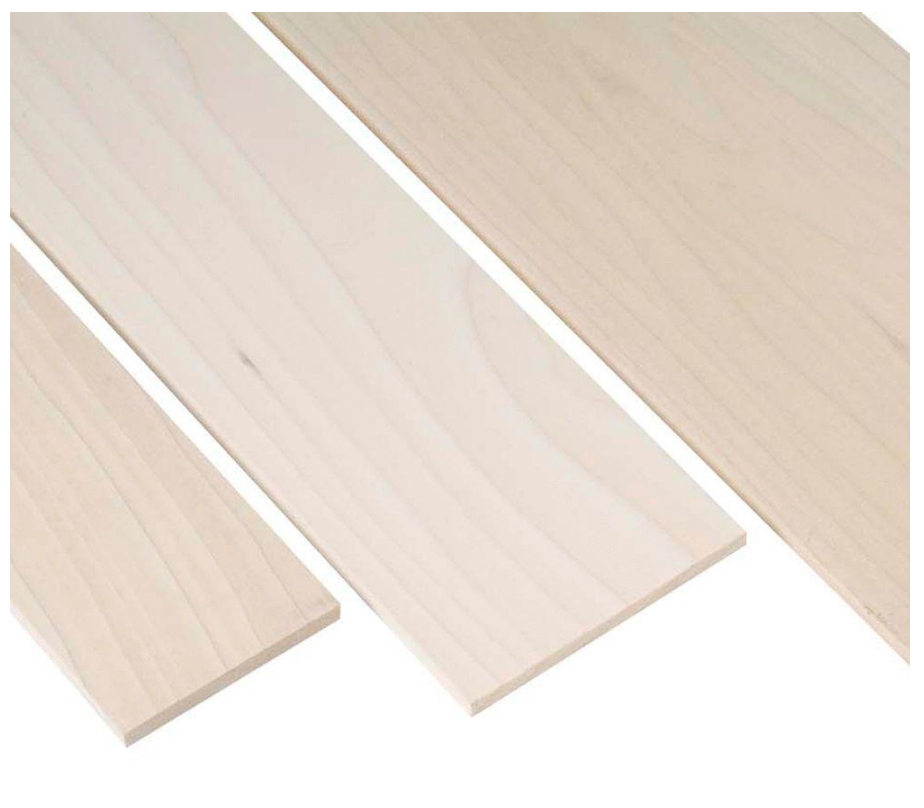
At my friendly neighborhood Home Depot, they sell 24" long poplar and oak pieces in various widths. They look like your standard boring hobby wood, and buying a whole bunch won't set you back much.
Fancy photo staging out of this stuff? Are you kidding?
Here's your hardware store list:
- Oak or poplar hobby boards, 24" long ones. Get creative on mixing up board widths, as long as when you have them all lined up they make a 24" x 24" square or close enough. I used oak cause I'm a sucker for wood grain.
- Wood glue
- A 24"x24" plywood board (you're giving yourself something to glue the hobby board to)
- A small bag of 1/8" tile spacers
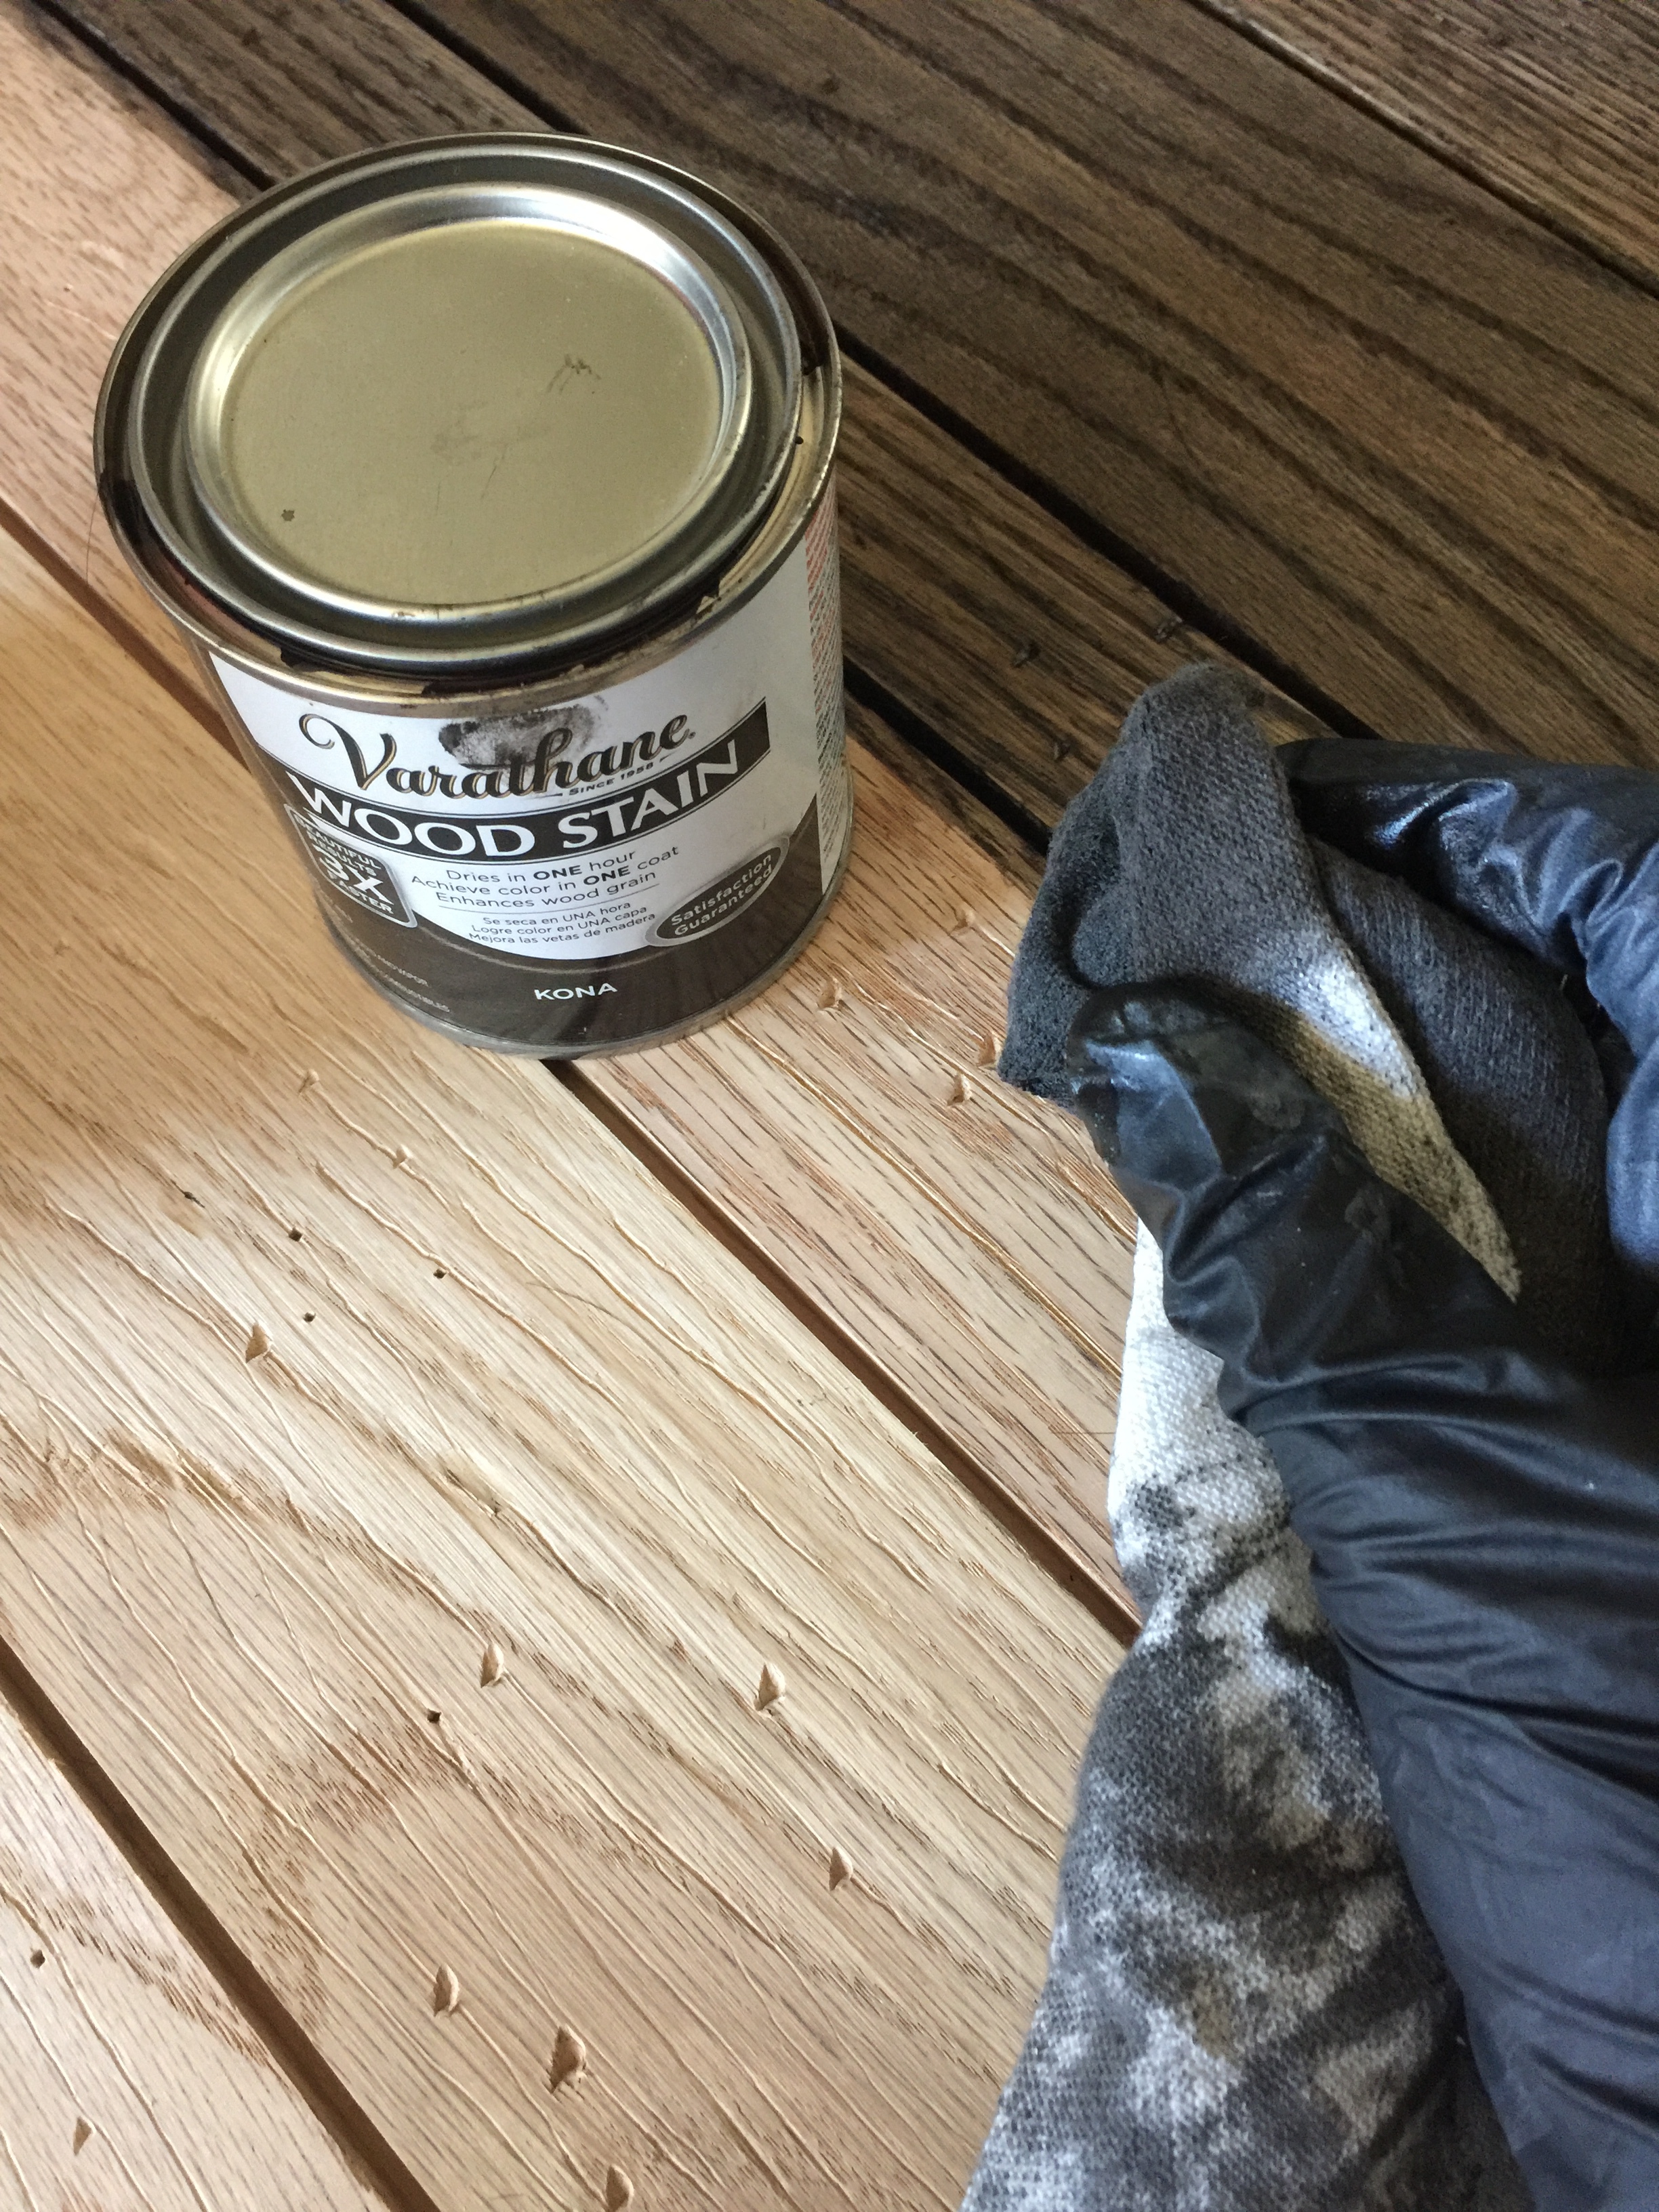
- The tiniest container of the wood stain of your choice. I used Kona with a dash of Ebony. I like to mix things up.
Hopefully you have the following at home already. If you don't, borrow them or buy them. Don't go nuts on buying fancy stuff though, we're supposed to be saving money here.
- A hammer
- A nail
- A few throw-away rags
- Disposable gloves
Step One
Glue your hobby boards to your square plywood board with your new wood glue, using the tile spacers to put an attractive little gap between each cheap little plank. Line your plank widths up in any pattern you want. Wait about a day for that to dry.
Pro tip: Everything dries best if you weigh your hobby board down onto the square plywood board until it's set. I like to set a second 24"x24" plywood board on top like a sandwich and clamp it all together.
Fun Step
When everything's dry, you get to do the best bit. Time to make those cheap hobby boards look expensive. Take your time. The more time you spend the more depth there is to the illusion that these crap boards are aged and expensive.
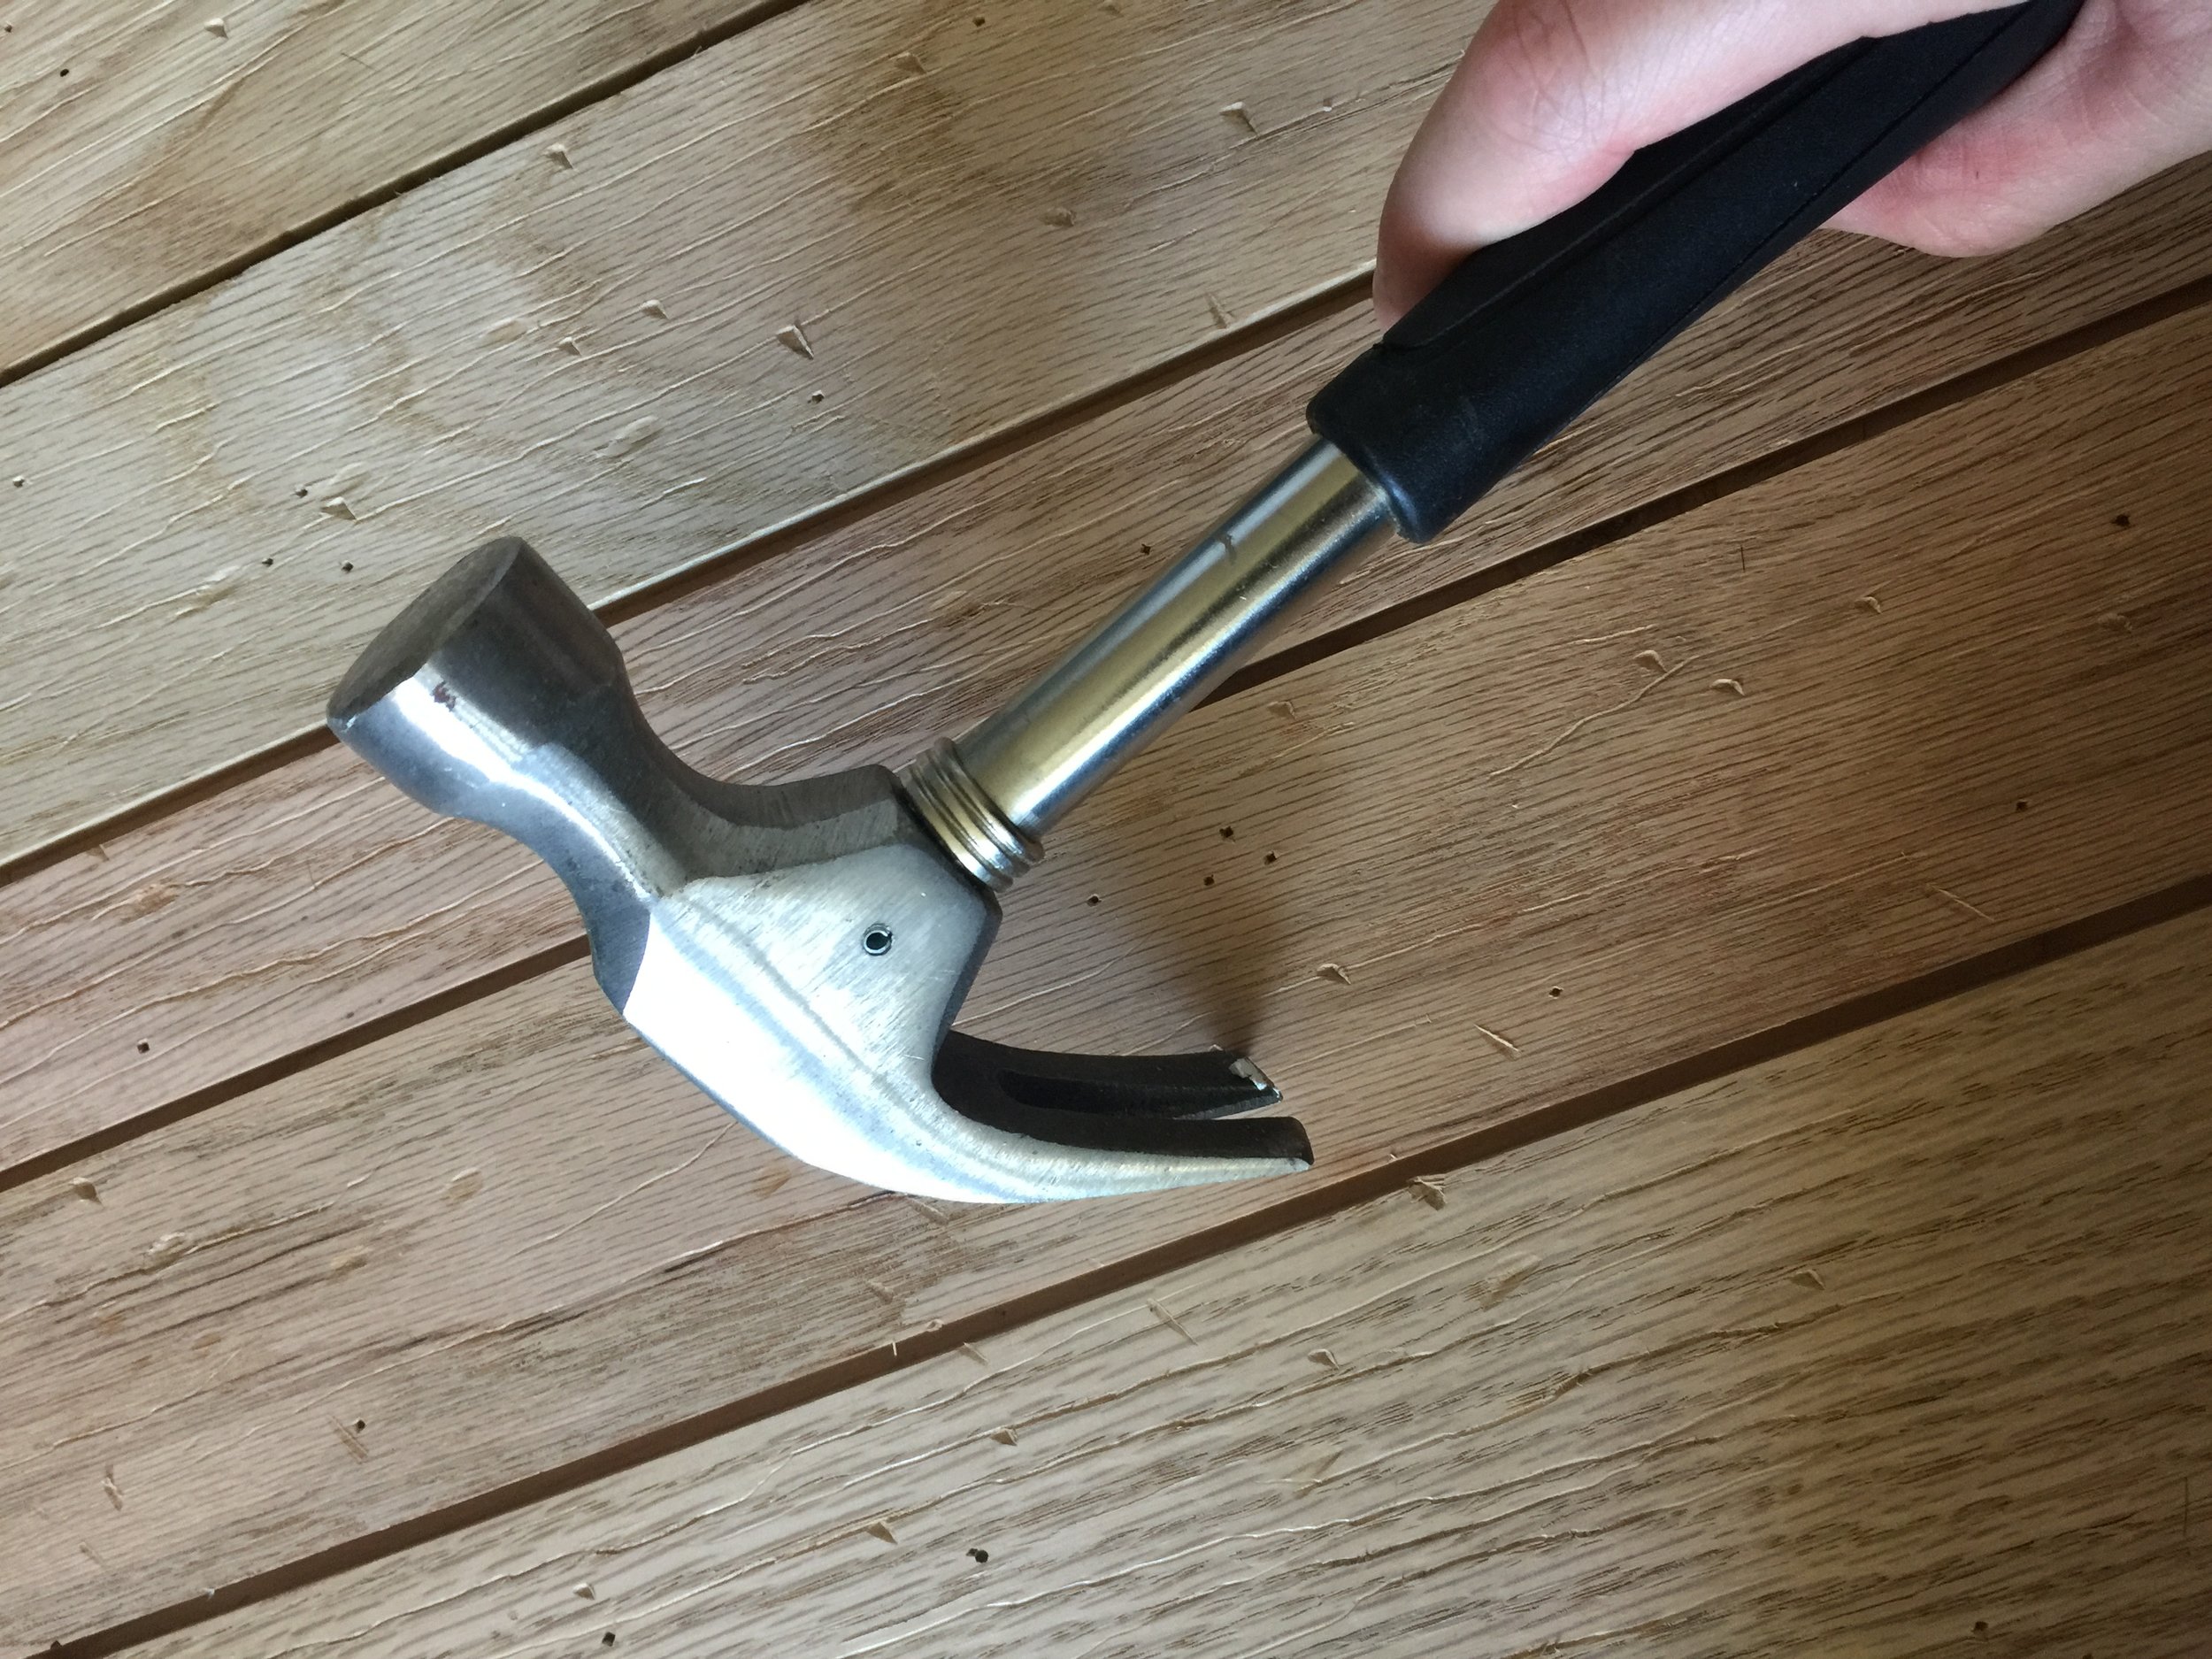
It's Hammer Time!
Hit the planks all over with both sides of your hammer. The head creates shallow crescent shaped dents, the nail remover end creates lovely triangular gouges. Have fun with this step. Get funky with the patterns and the number of dents and gouges, as well as with how much force there is behind your hammer blows to create visual depth to your damage.

There are no mistakes here, only happy accidents.
Use your nail to scratch into the wood along the direction of the wood grain. You might get the squicky sense that you're ruining all your hard work. Good. The more damage the better. Experiment with using both ends of the nail, head and point, to see what kinds of new and exciting texture you can get. Now, see those little holes in the above photo? That's nail damage 2.0.
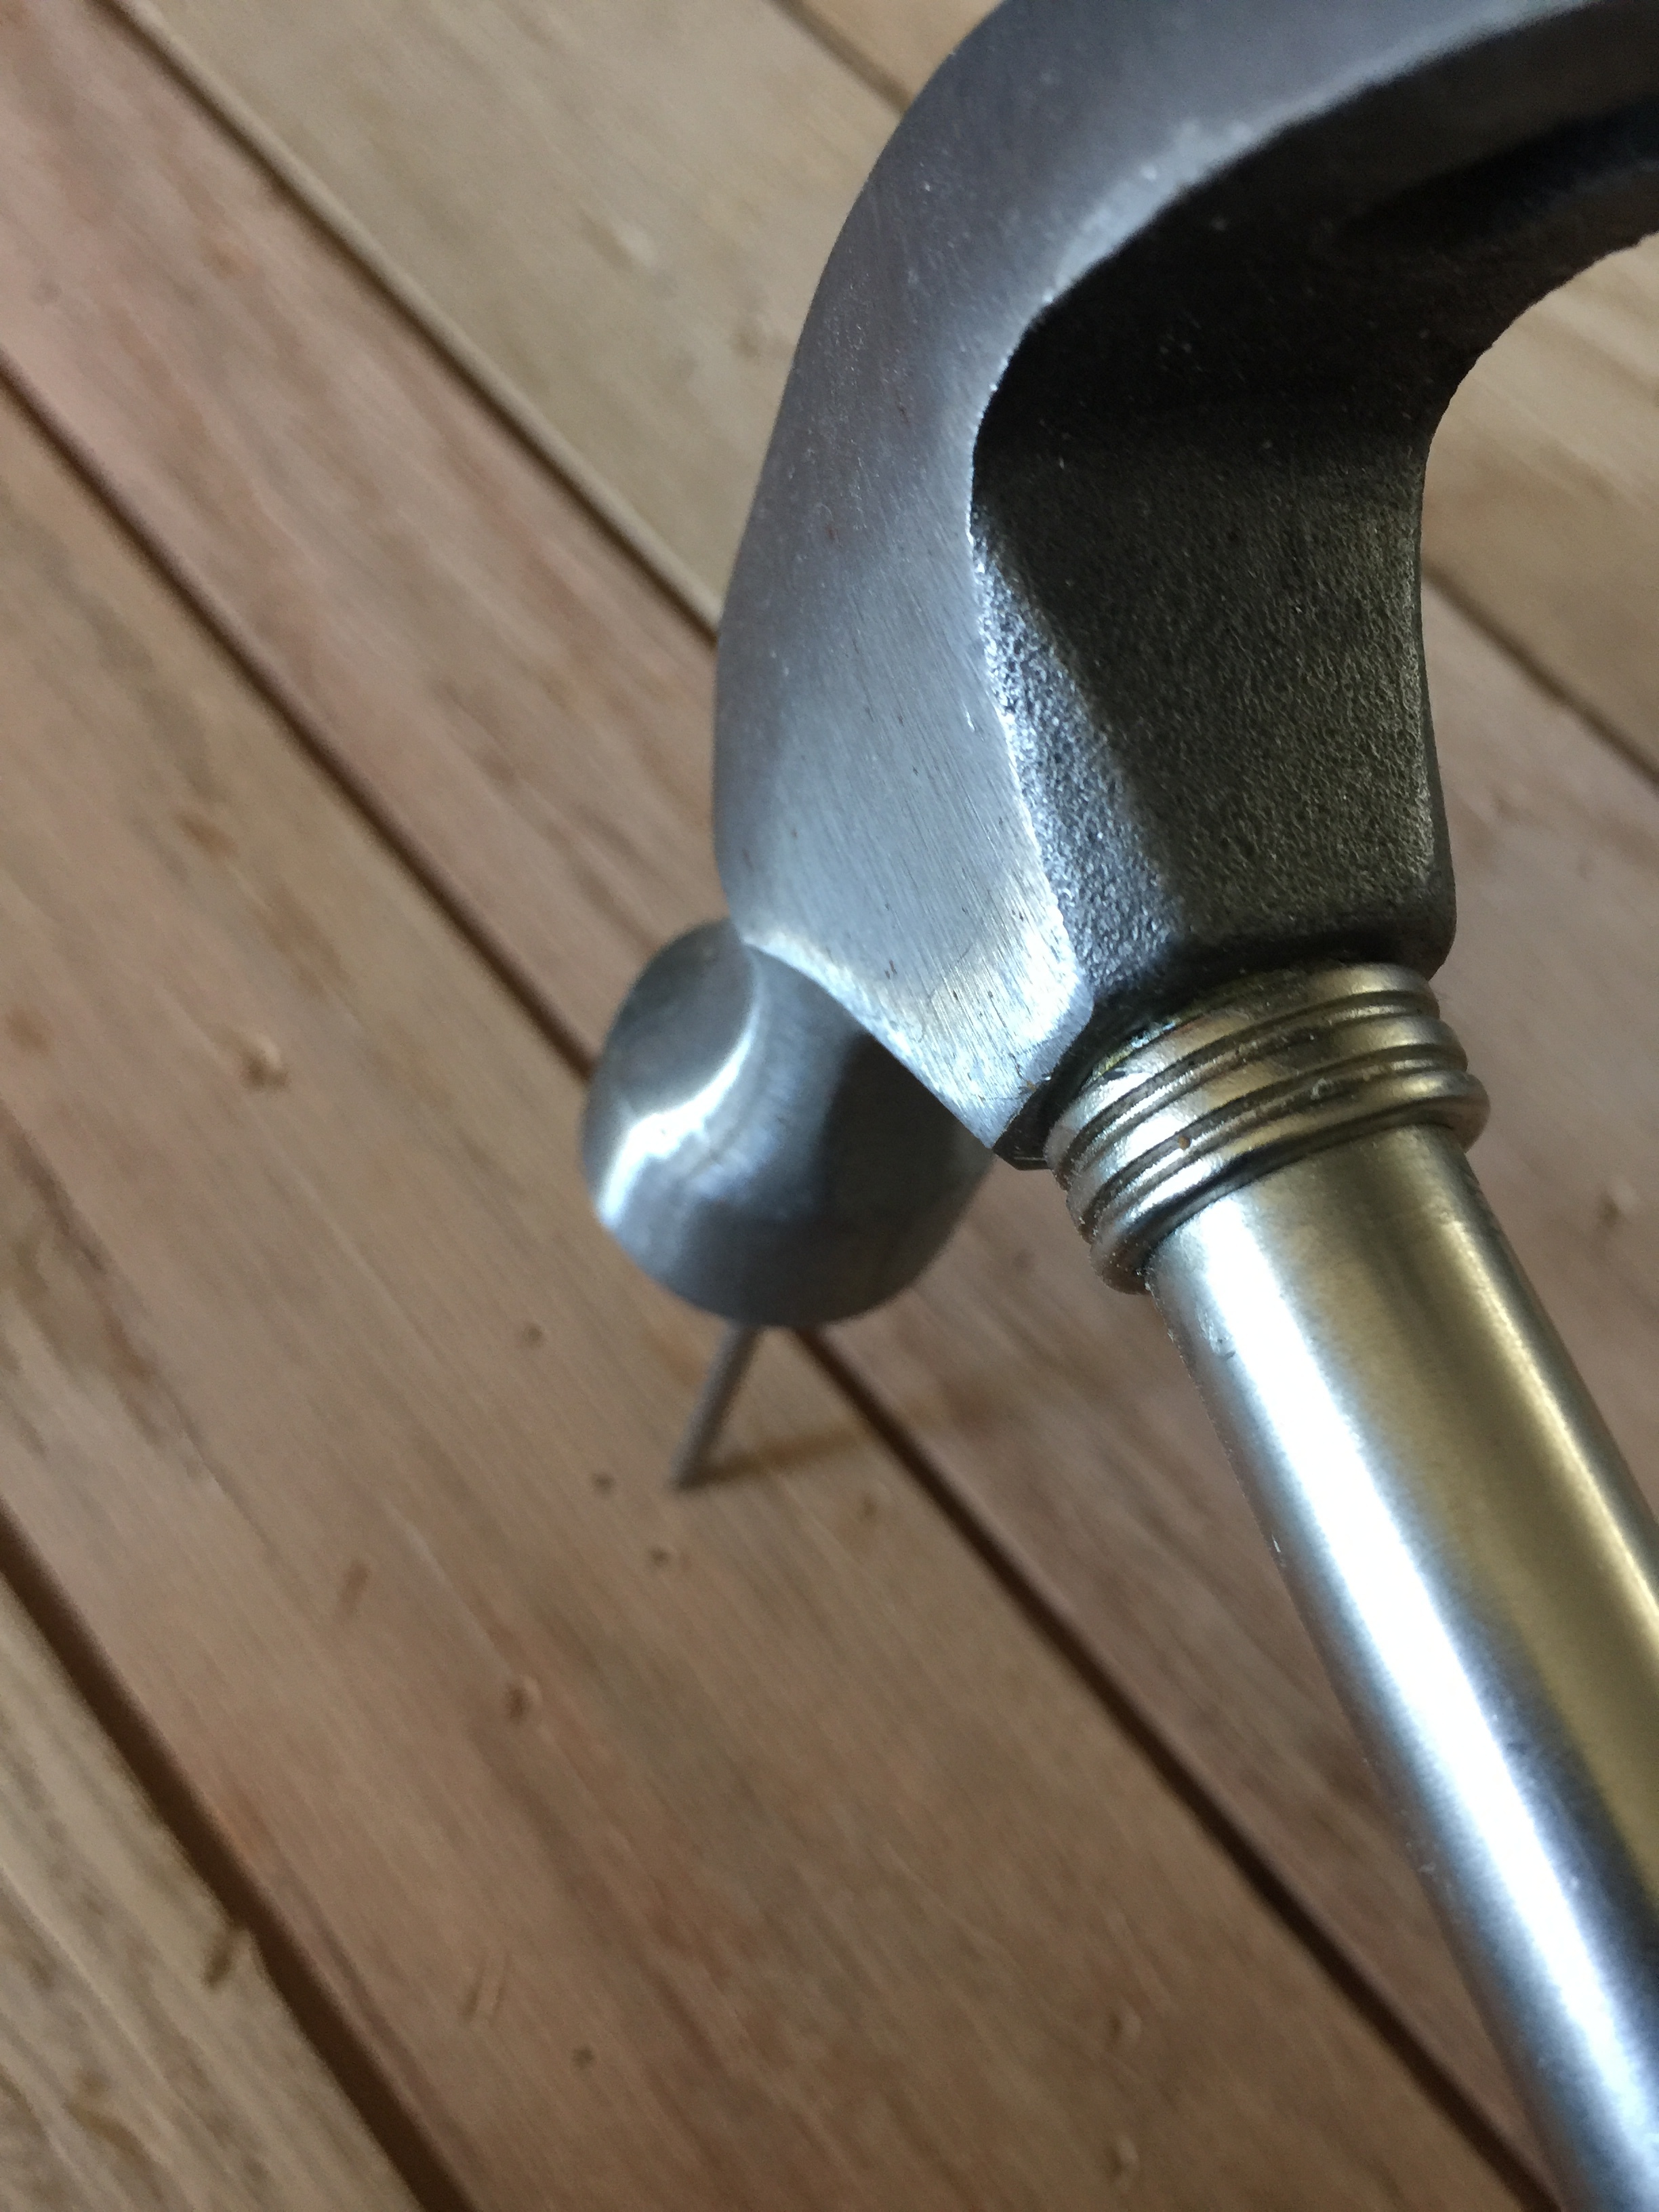
Use your trusty hammer along with your intrepid nail to hammer shallow holes in random groupings and patterns all over your hobby wood. Old wood has worm holes in it. This will create the illusion of more age.
Final Step
Put on those disposable gloves, open that wood stain you picked out, and start wiping it on your beat up wood with one throw-away rag and immediately wiping the excess off with another rag.
Time to make Mr. Miyagi proud.
Make sure you get your wood stain deep into every gouge, dent, scratch, and hole. And make sure you get it in every gap between each wood piece. Take your time, there's no rush. Saturate everything, then use fresh rags to wipe off all the excess stain. This part can get messy. Use a tarp or newspaper underneath your project, and wear clothes you hate.
Your end result should look something like this:
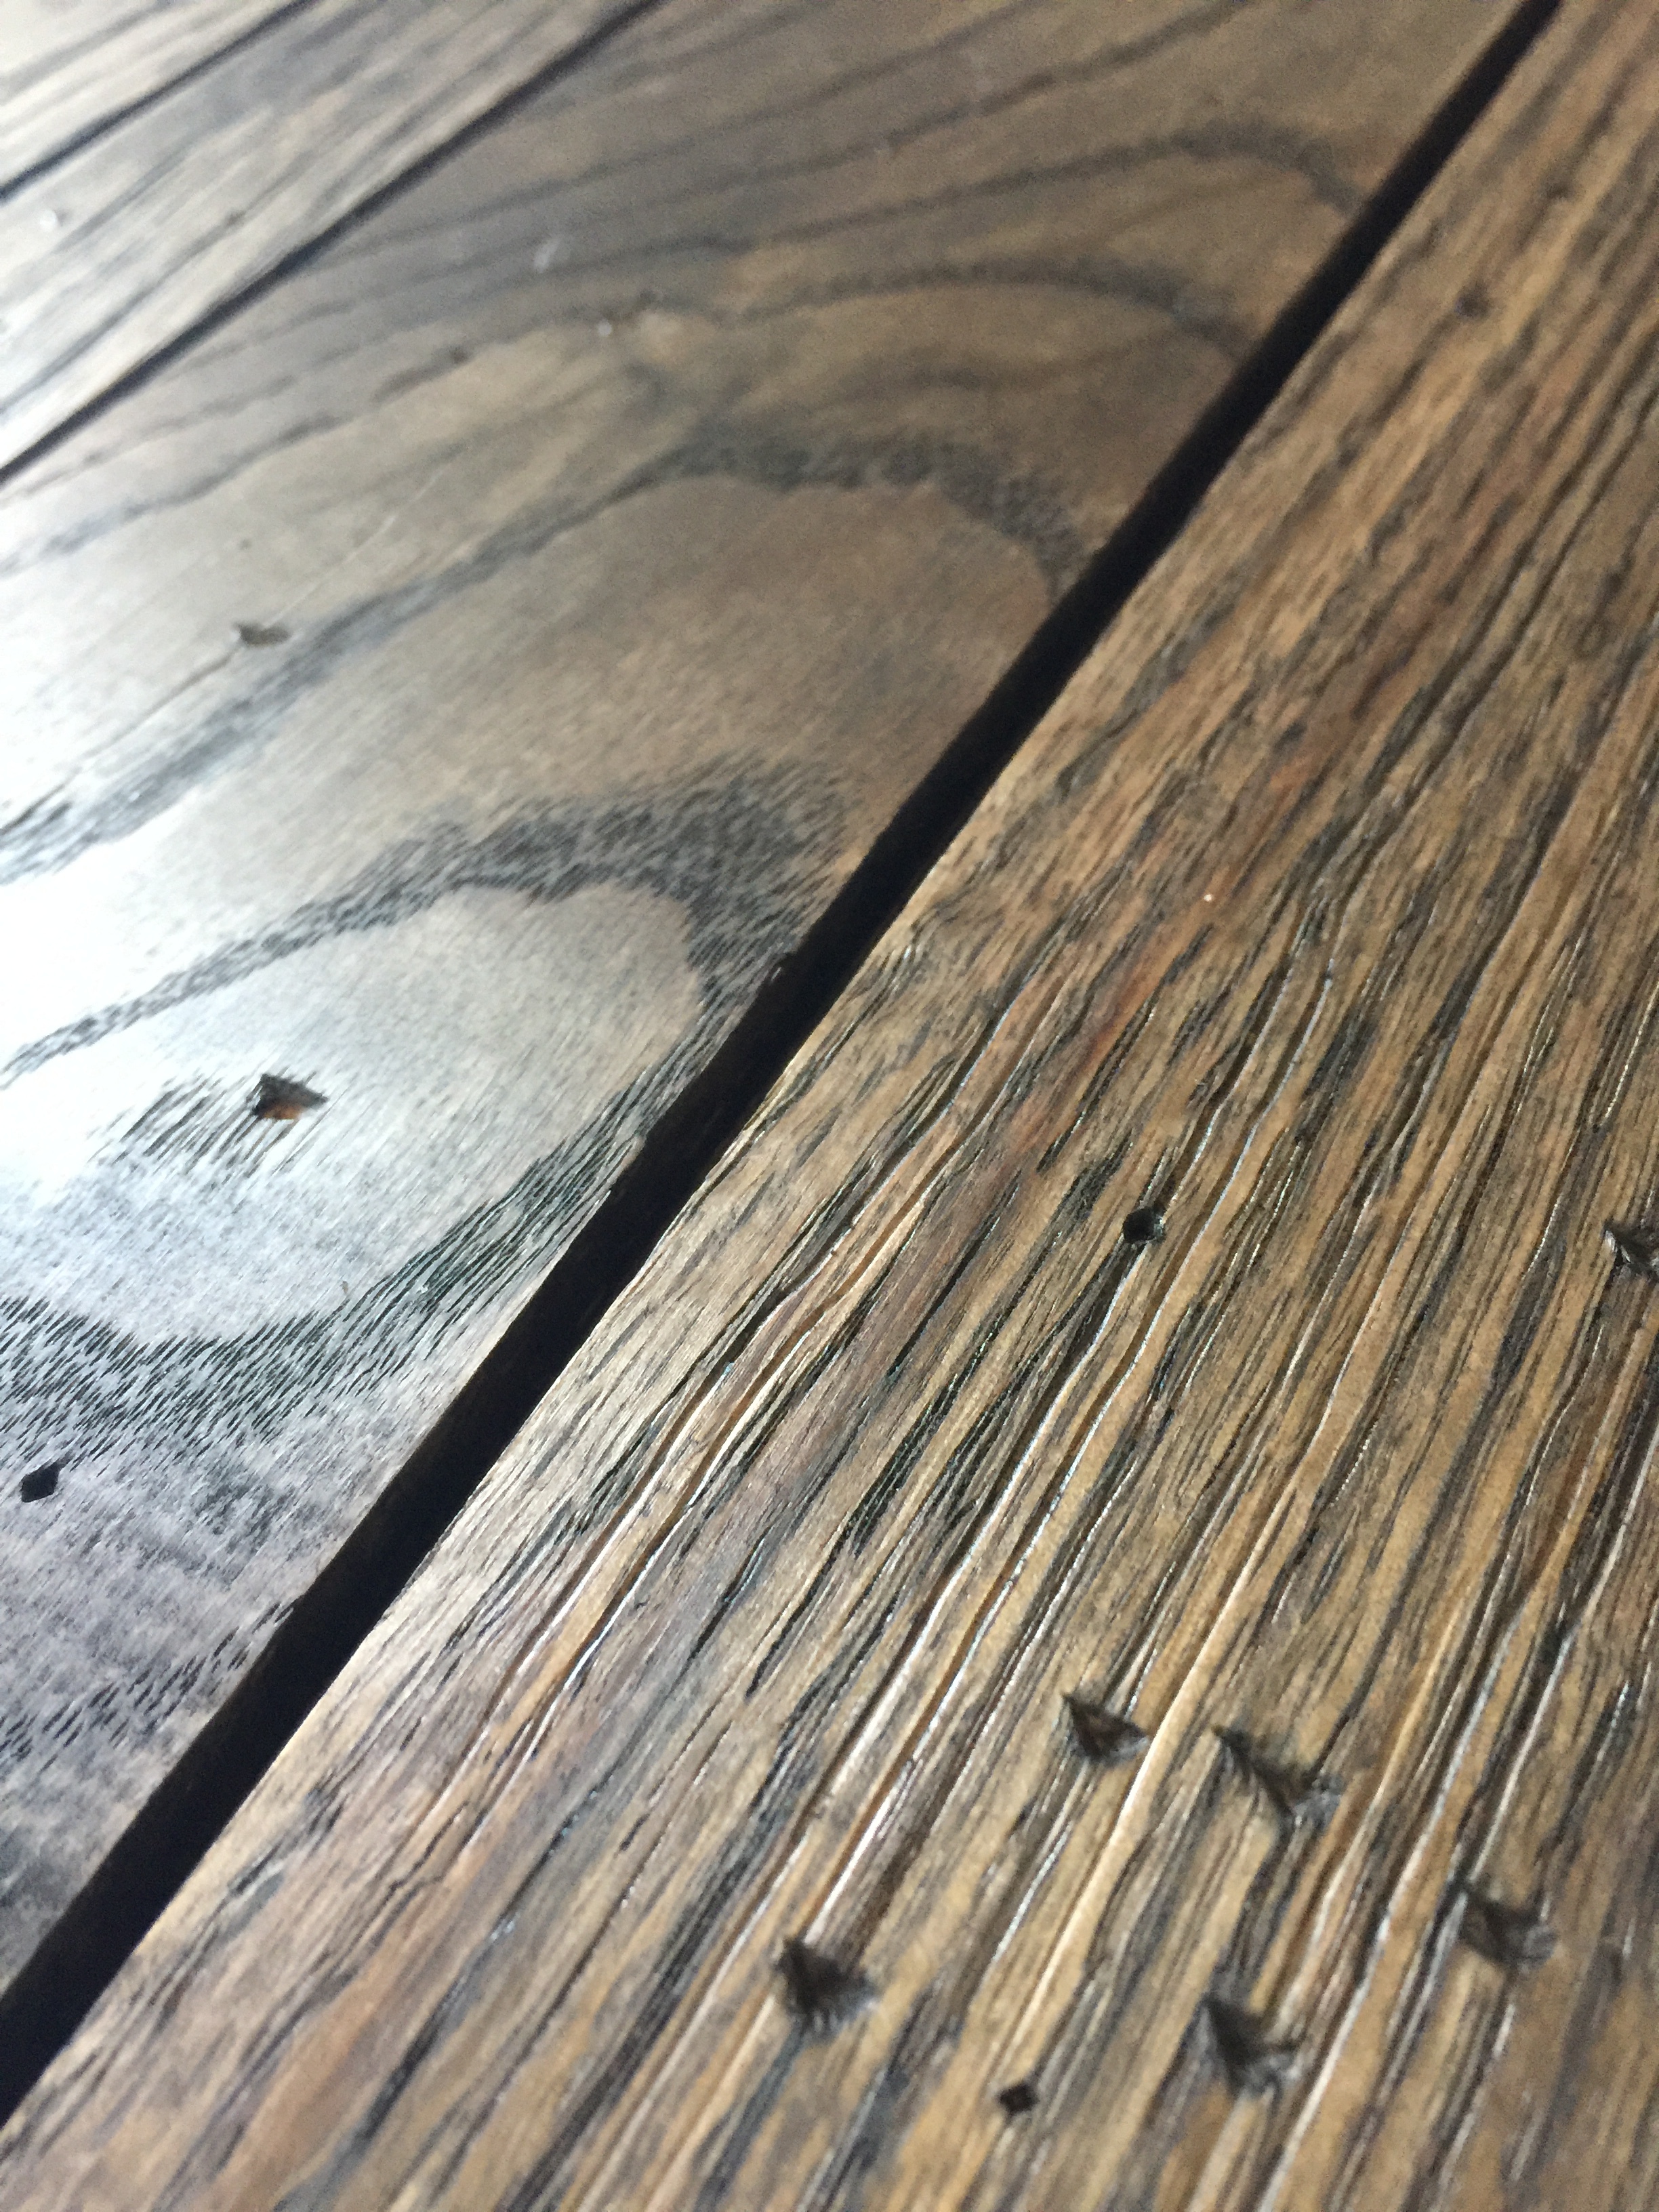
Holy crap, that's not hand-hewn reclaimed wood?
Not bad for a few dollars and an afternoon. You can use this one of a kind 24"x24" masterpiece as a back or bottom of any small object photo for a convincing repurposed old wood backdrop or staging.
Happy crafting!